

Overview
RabbitPay supports QR-based payments through Razorpay. Before merchants can accept QR payments at checkout, they must create a QR Code inside their Razorpay account. This is a one-time setup required during the RabbitPay onboarding process.RabbitPay does not require the downloaded QR image. Creating the QR Code in Razorpay is what enables QR payment functionality on the merchant’s Razorpay account — the image itself does not need to be uploaded anywhere.
Navigation
Follow this path inside the Razorpay Dashboard to reach the QR Codes section:Step 1: Open the QR Codes Section
- Log in to the Razorpay Dashboard.
- In the left navigation menu, look for QR Codes under Payment Products.
- If QR Codes is not visible, click +10 More (or Show More) at the bottom of the Payment Products list to expand additional options.
- Select QR Codes from the expanded list.
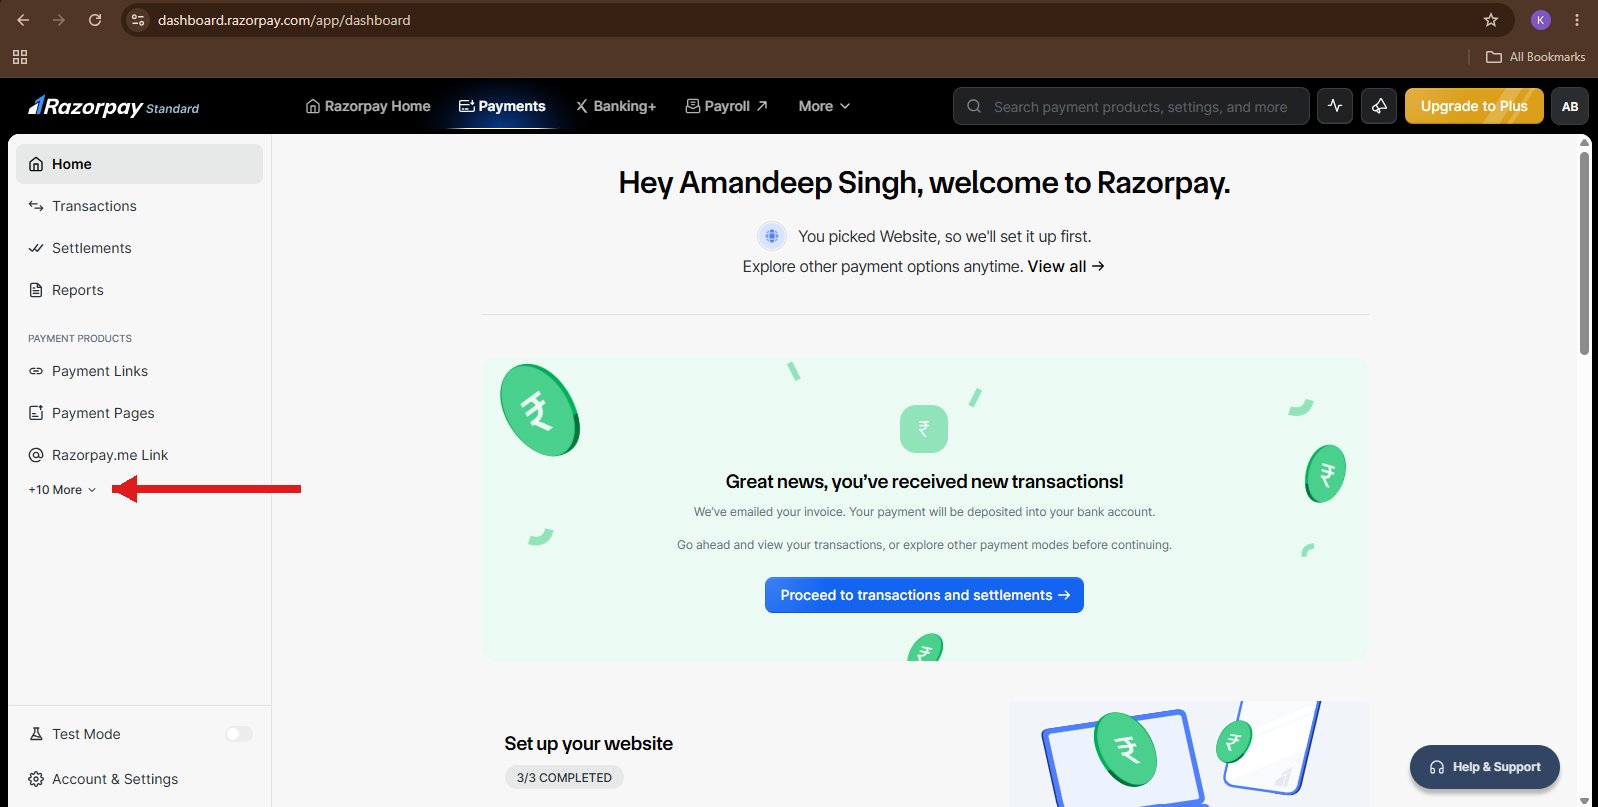
Figure 1: Navigate to Payments → QR Codes from the Razorpay Dashboard.
Step 2: Create a New QR Code
- On the QR Codes page, click + Create QR Codes in the top-right corner.
- The Create QR Code dialog will open.
- Keep all default settings unchanged:
- QR Usage — Multiple Payments
- Accept only fixed amount on this QR? — No
- Description — leave blank
- Click Create QR Code to confirm.
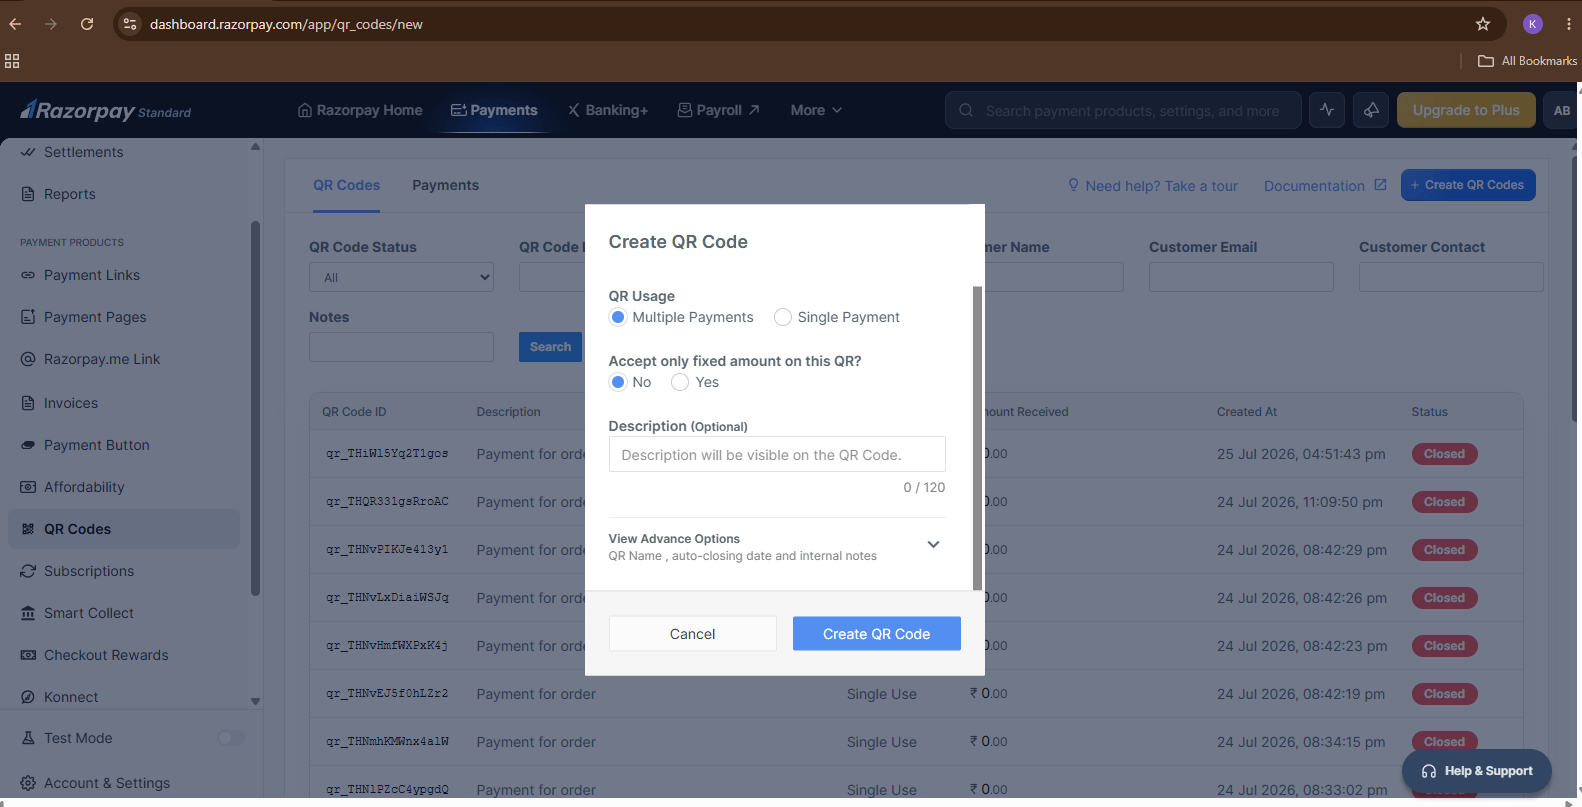
Figure 2: Create a new QR Code using the default Razorpay settings.
Step 3: Download the QR Code
Once the QR Code has been created successfully:- Locate the newly created QR Code at the top of the QR Codes list.
- Click the download icon next to the entry to download the QR image.
The downloaded QR image is not required by RabbitPay and does not need to be uploaded anywhere. Simply creating the QR Code is sufficient to enable QR payment functionality on the merchant’s Razorpay account.
Verification
Your QR Code setup is complete when:- The QR Code has been created successfully in the Razorpay Dashboard.
- The new QR Code appears in the QR Codes list with an Active status.
- QR payment functionality is now enabled for your Razorpay account and ready to be used by RabbitPay at checkout.