> ## Documentation Index
> Fetch the complete documentation index at: https://docs.rabbitpay.ai/llms.txt
> Use this file to discover all available pages before exploring further.
# How to Add GSTIN for GST-Compliant Shopify App Fee Invoices
> Add your GSTIN and business details in RabbitPay to keep your Shopify app fee invoices GST-ready.
RabbitPay allows merchants to add their **GSTIN and business details** directly from the RabbitPay Dashboard.
Once your GSTIN is saved, your registered business information can be used for billing and GST-related invoices for your Shopify app fees.
## Prerequisites
Before you begin, make sure you have:
* An active **RabbitPay merchant account**
* Your valid **GSTIN**
* Your registered business details as shown on the GST portal
***
## Step 1: Open Store Details
1. Log in to your **RabbitPay Dashboard**.
2. In the left sidebar, expand **Settings**.
3. Select **Store Details**.
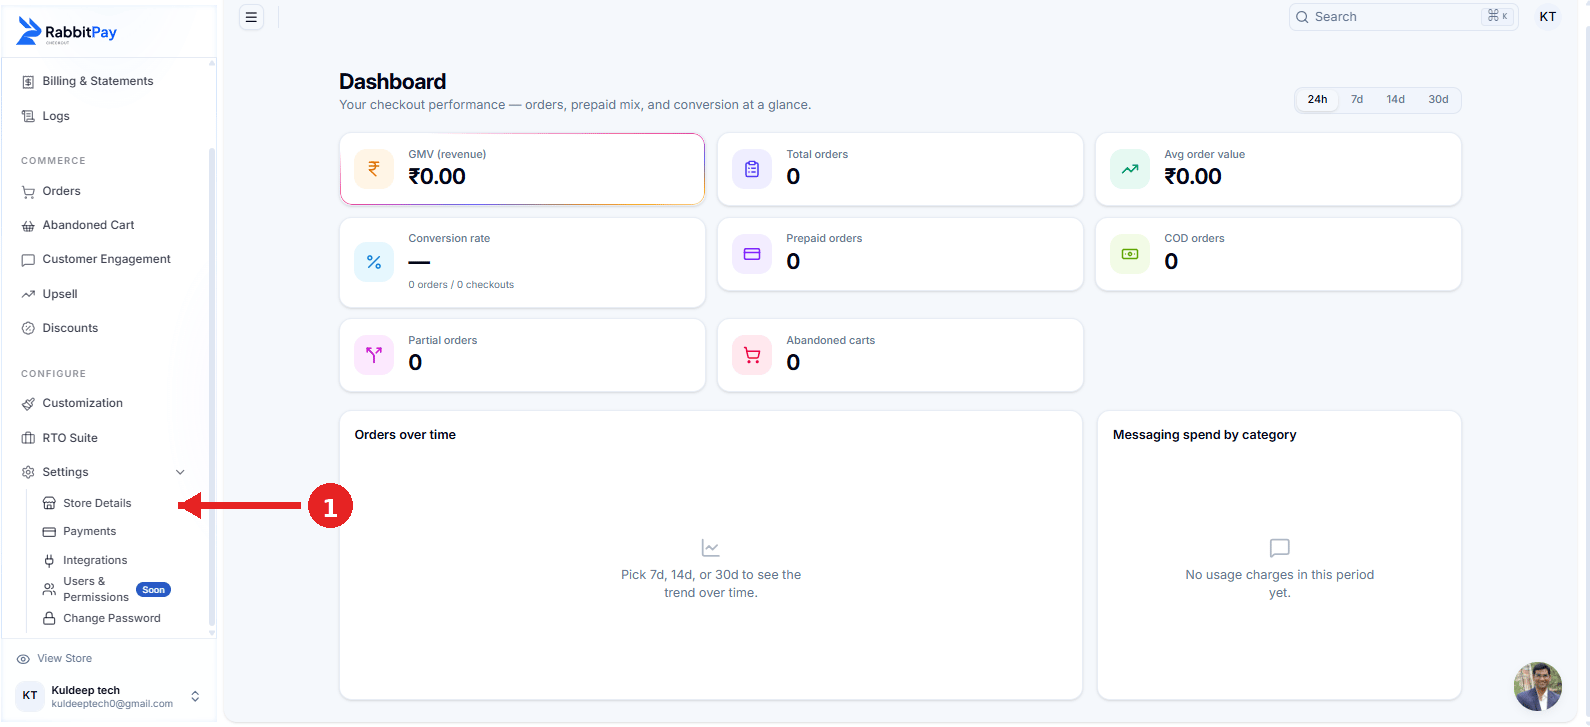 Store Details is where you can manage your business information used for RabbitPay billing and invoices.
***
## Step 2: Edit Your Business Details
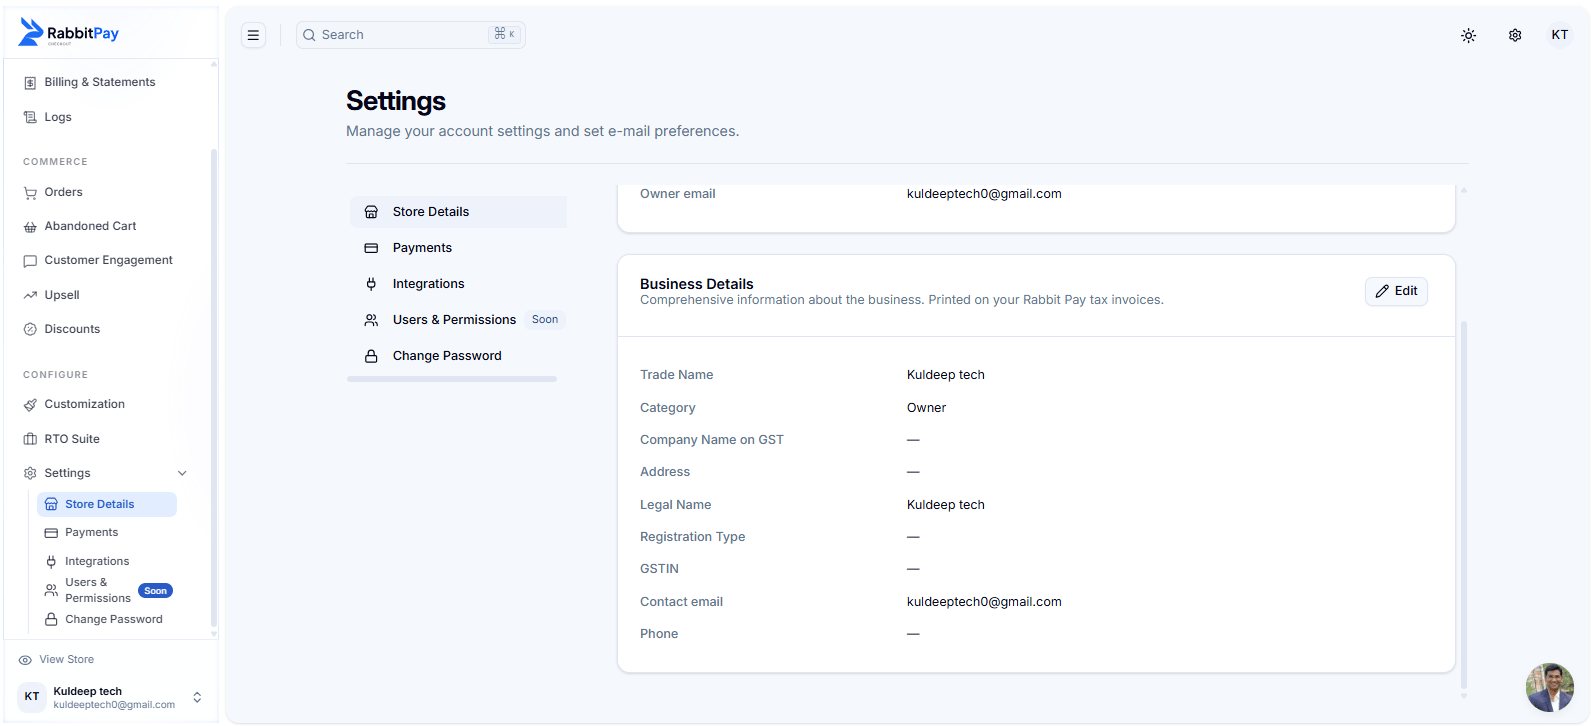
On the **Store Details** page, find the **Business Details** section.
Click **Edit** to update your business information.
Store Details is where you can manage your business information used for RabbitPay billing and invoices.
***
## Step 2: Edit Your Business Details
On the **Store Details** page, find the **Business Details** section.
Click **Edit** to update your business information.
 ***
## Step 3: Add Your GSTIN
In the **Edit business details** window, enter your registered business information.
Fill in the relevant fields:
* **Trade name** — Your business or store trade name.
* **Legal name** — The legal name of your business.
* **Company name on GST** — Enter the name registered on the GST portal.
* **GSTIN** — Enter your valid 15-character GSTIN.
* **Registration type** — Select the applicable GST registration type.
* **Business address** — Enter your registered business address.
* **Phone** — Enter your business contact number.
***
## Step 3: Add Your GSTIN
In the **Edit business details** window, enter your registered business information.
Fill in the relevant fields:
* **Trade name** — Your business or store trade name.
* **Legal name** — The legal name of your business.
* **Company name on GST** — Enter the name registered on the GST portal.
* **GSTIN** — Enter your valid 15-character GSTIN.
* **Registration type** — Select the applicable GST registration type.
* **Business address** — Enter your registered business address.
* **Phone** — Enter your business contact number.
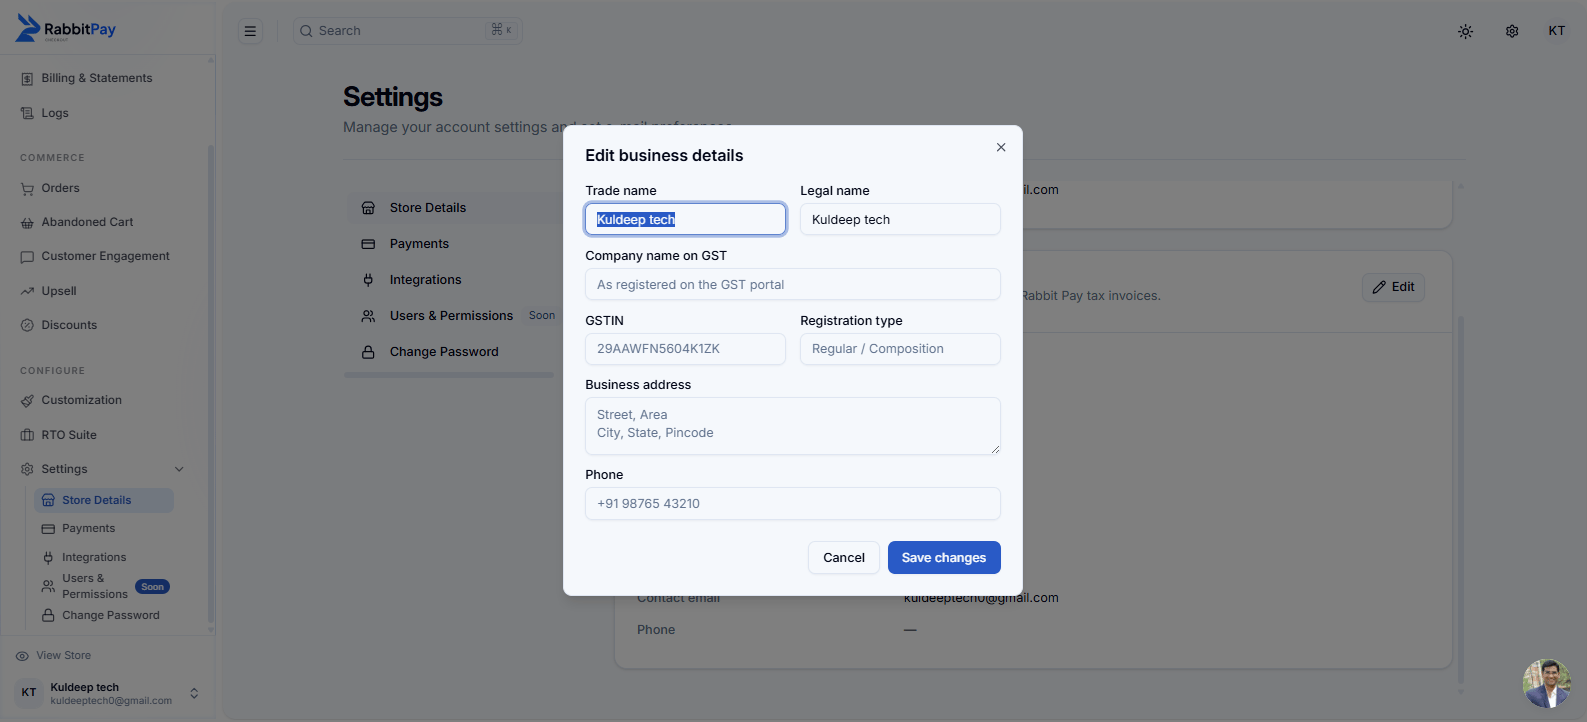 Make sure your GSTIN and registered business information match the details available on the GST portal.
***
## Step 4: Save Your Details
After entering the required information:
1. Review your GSTIN and business details.
2. Click **Save changes**.
3. RabbitPay will update your business information.
Your GSTIN has been added successfully when it appears in the **Business Details** section.
***
## What This Enables
Adding your GSTIN helps RabbitPay associate your registered business information with your account billing details.
Keep your GST registration details associated with your RabbitPay merchant account.
Maintain your registered trade name, legal name, GSTIN, address, and contact information in one place.
Your saved business details can be used for billing and invoice-related information for RabbitPay services.
Update your business details whenever your registered information changes.
***
## Result
Your GSTIN and business details are now saved in RabbitPay.
You can return to:
**Settings → Store Details → Business Details**
to review the information at any time.
Always keep your GSTIN and registered business information accurate and up to date.
Make sure your GSTIN and registered business information match the details available on the GST portal.
***
## Step 4: Save Your Details
After entering the required information:
1. Review your GSTIN and business details.
2. Click **Save changes**.
3. RabbitPay will update your business information.
Your GSTIN has been added successfully when it appears in the **Business Details** section.
***
## What This Enables
Adding your GSTIN helps RabbitPay associate your registered business information with your account billing details.
Keep your GST registration details associated with your RabbitPay merchant account.
Maintain your registered trade name, legal name, GSTIN, address, and contact information in one place.
Your saved business details can be used for billing and invoice-related information for RabbitPay services.
Update your business details whenever your registered information changes.
***
## Result
Your GSTIN and business details are now saved in RabbitPay.
You can return to:
**Settings → Store Details → Business Details**
to review the information at any time.
Always keep your GSTIN and registered business information accurate and up to date.